Summer holiday: Weeks 29 and 30
Tips and advice
HairMaster: How to replace heating tubes
The heating tube in your HairMaster is the part that wears out with use and can, of course, become worn. Fortunately, replacement is easy. Safety first: Turn off the HairMaster, unplug it, and let the head cool completely. The heating tube is made of glass – handle it carefully.
23. September 2025
What you need
How to do it
Check the serial number
You’ll find the serial number under the head of your HairMaster. The serial number must be above 3,000,000 for you to be able to replace the tube.

Preparation
- Turn off your HairMaster
- Let it cool down
Remove the grid
Push the metal grid toward the machine itself and pull/tilt it out. The grid is fixed in 2 holes at the outer arm of your HairMaster. Take a look before you start pushing/pulling.


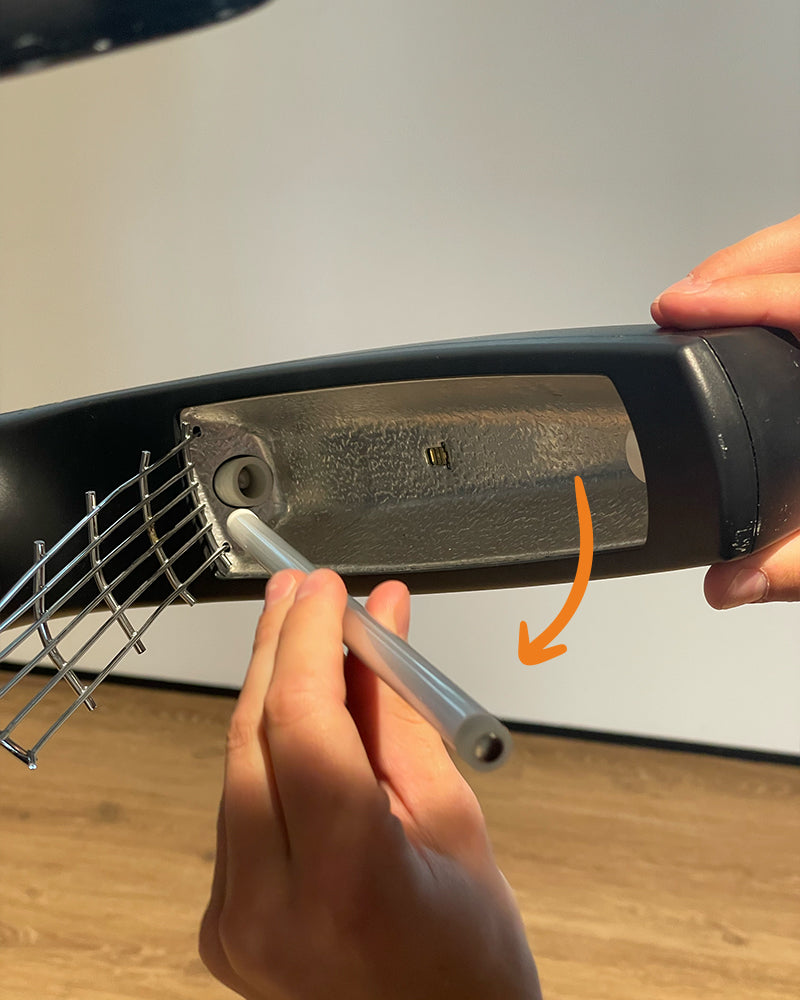
Loosen the old heating tube
Press the heating tube slightly toward one end so the opposite end loosens from the socket, and gently tilt it out.
Is it stuck? Do not use force. Give the tube a slight twist (turn it just a little) while pressing in slightly. Once it’s loose, you can tilt it out without resistance – you’ll know, but it can be tricky on older machines.


Install the new heating tube
Do the same in reverse: Insert one end into the socket, press lightly, and tilt the other end into place. The same rules apply as before: Do not use force. Give the tube a slight twist (turn it just a little) while pressing down slightly into the socket.
Put the grid back on
Opposite to how you loosened the grid, now guide it back toward the arm and press it against the machine to fit the grid into the 2 holes.
Turn on and test
Power on, turn on your HairMaster, and check that the tube heats steadily and evenly.
Written by Rasmus Østergaard
Author at Just Add People
Newsletter


Meet the author
Rasmus Østergaard is editor and journalist at Just Add People. Rasmus is responsible for making useful information about the hairdressing profession and the beauty industry accessible to everyone.